Table of Contents
- Introduction to Tile Installation in Singapore
- What Is Tile Installation?
- Why Proper Tile Installation Matters
- Different Types of Tile Installation Methods
- Step-by-Step Tile Installation Process
- Preparing the Surface Before Tile Laying
- Tile Layout Planning and Measurement
- Applying Tile Adhesive and Installing Tiles
- Grouting and Finishing Works
- Tile Installation Timeline in Singapore
- Tile Installation Cost Factors
- Common Tile Installation Problems
- How to Maintain Newly Installed Tiles
- Choosing a Tile Installation Contractor in Singapore
- Conclusion
Introduction to Tile Installation in Singapore
Tiles are one of the most popular choices for flooring and wall finishes in Singapore homes. They are commonly used in:
- Living rooms
- Kitchens
- Bathrooms
- Bedrooms
- Outdoor areas
Tiles are preferred because they offer:
- Durability
- Easy maintenance
- Water resistance
- Many design options
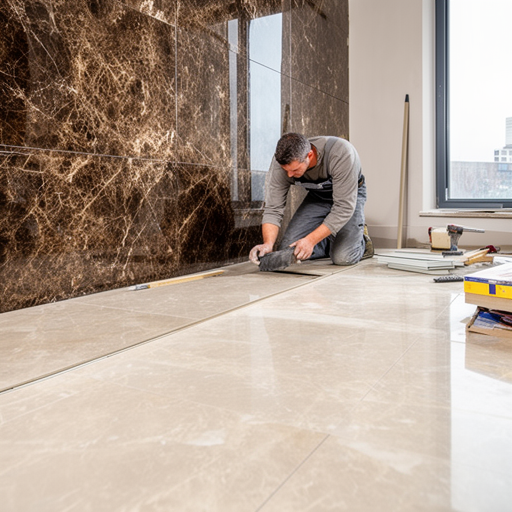
However, selecting high-quality tiles is only one part of achieving a good renovation result with tiling contractors. Proper installation plays an equally important role in ensuring your tiles remain attractive and functional for many years.
A poorly installed tile surface can lead to problems such as:
- Hollow tiles
- Uneven flooring
- Cracked tiles
- Loose tiles
- Water seepage
This is why professional tile installation Singapore services are important for homeowners planning a renovation.
This guide explains the complete tile installation process, preparation steps, cost factors, common mistakes, and tips to achieve long-lasting tile results.
What Is Tile Installation?
Tile installation is the process of placing tiles onto a prepared surface using suitable materials and techniques.
The process involves several stages, including:
- Surface preparation
- Tile measurement
- Layout planning
- Adhesive application
- Tile placement
- Grouting
- Final inspection
Tiles can be installed on different surfaces, such as:
- Concrete floors
- Cement screed
- Walls
- Existing prepared surfaces
The quality of installation depends on factors such as:
- Workmanship
- Materials used
- Surface condition
- Installation method
A professional installer ensures each step is completed properly.
Why Proper Tile Installation Matters
Many homeowners focus heavily on tile selection but underestimate installation quality.
Even premium tiles may fail if installed incorrectly.
Prevents Hollow Tiles
Hollow tiles occur when there are gaps between the tile and the base surface.
Causes may include:
- Uneven adhesive coverage
- Poor surface preparation
- Incorrect installation method
Proper installation helps ensure strong bonding.
Improves Durability
Well-installed tiles can last for many years.
Good workmanship reduces the risk of:
- Cracks
- Movement
- Loose tiles
Creates a Better Appearance
Professional installation provides:
- Straight tile lines
- Even spacing
- Consistent alignment
This improves the overall appearance of your home.
Reduces Future Repair Costs
Poor installation can result in expensive repairs.
Replacing damaged tiles later may involve:
- Removing surrounding tiles
- Additional labour
- Extra material costs
Different Types of Tile Installation Methods
There are several common tile installation methods used in Singapore.
Cement-Sand Method
This traditional method uses a cement mixture as the tile base.
Advantages:
- Strong bonding
- Suitable for certain surfaces
Considerations:
- Requires proper skill
- Longer preparation time
Tile Adhesive Method
Modern renovations often use tile adhesive.
Advantages:
- Better control
- Suitable for many tile types
- Faster installation
It is commonly used for:
- Porcelain tiles
- Ceramic tiles
- Wall tiles
Tile Overlay Method
Tile overlay involves installing new tiles over existing tiles.
Advantages:
- Less hacking works
- Faster renovation
However, it is only suitable when the existing surface is:
- Stable
- Level
- Free from damage
Step-by-Step Tile Installation Process
Step 1: Site Inspection
Before installation begins, contractors inspect the area.
They check:
- Existing surface condition
- Measurements
- Moisture levels
- Floor levels
This helps determine the correct installation approach.
Step 2: Surface Preparation
Surface preparation is one of the most important steps.
The base must be:
- Clean
- Flat
- Dry
- Free from dust
Any problems such as:
- Cracks
- Uneven areas
- Damaged surfaces
should be repaired before tile installation.
A poor base can affect the final result.
Step 3: Measuring the Area
Accurate measurement helps determine:
- Number of tiles required
- Cutting requirements
- Layout design
Contractors calculate:
- Room dimensions
- Tile size
- Spacing requirements
Proper measurement reduces material waste.
Tile Layout Planning and Measurement
Before placing tiles, contractors plan the layout.
Important considerations include:
Tile Direction
The direction of tiles affects the appearance of a room.
For example:
- Long tiles can make spaces appear larger
- Certain patterns create visual effects
Starting Point
Installers usually determine the best starting position to ensure balanced results.
This helps avoid:
- Very small tile pieces at edges
- Uneven patterns
Tile Spacing
Spacing between tiles is controlled using:
- Tile spacers
- Professional measuring tools
Consistent gaps allow proper grouting.
Applying Tile Adhesive and Installing Tiles
After preparation, the actual tile installation begins.
Applying Adhesive
The adhesive is spread evenly on the surface.
Proper coverage helps prevent:
- Air gaps
- Loose tiles
- Hollow sounds
Placing Tiles
Tiles are carefully positioned according to the planned layout.
Installers check:
- Alignment
- Level
- Spacing
Adjustments are made before the adhesive sets.
Cutting Tiles
Some areas require tile cutting, including:
- Corners
- Doorways
- Pipe openings
Accurate cutting creates a cleaner finish.
Grouting and Finishing Works
After tiles are fixed, grouting is applied.
Grout fills the spaces between tiles.
Benefits include:
- Preventing dirt accumulation
- Improving appearance
- Adding stability
Common grout colours include:
- White
- Grey
- Neutral tones
The choice depends on the tile design.
Final Inspection
Before completing the project, installers check:
- Tile alignment
- Surface level
- Grout quality
- Tile bonding
Any issues should be corrected before handover.
Tile Installation Timeline in Singapore
The installation duration depends on:
- Area size
- Tile type
- Installation method
- Surface condition
A small room may take less time, while a full-home renovation requires more planning.
Factors affecting timeline include:
- Surface repairs
- Custom tile patterns
- Drying periods
Proper scheduling helps avoid delays.
Tile Installation Cost Factors
The cost of tile installation depends on several factors.
Tile Material
Different tiles have different installation requirements.
Examples:
- Ceramic tiles
- Porcelain tiles
- Natural stone tiles
Tile Size
Large-format tiles may require:
- More careful handling
- More precise installation
Installation Area
Larger spaces require:
- More labour
- More preparation
Surface Condition
Additional preparation may be needed if the surface has:
- Uneven areas
- Cracks
- Existing damage
Design Complexity
Special layouts may increase installation time.
Examples:
- Patterns
- Decorative designs
- Feature walls
Common Tile Installation Problems
Hollow Tiles
Signs include:
- Hollow sounds when tapped
- Movement
Possible causes:
- Poor adhesive coverage
- Incorrect preparation
Uneven Tiles
Uneven surfaces may occur due to:
- Poor levelling
- Installation errors
Cracked Tiles
Possible causes include:
- Movement underneath
- Poor base preparation
- Incorrect installation
Grout Issues
Problems may include:
- Crumbling grout
- Staining
- Discolouration
Proper materials and workmanship help reduce these issues.
How to Maintain Newly Installed Tiles
After installation, proper care helps extend tile lifespan.
Allow Proper Setting Time
Avoid heavy use immediately after installation.
This allows:
- Adhesive to cure
- Grout to strengthen
Clean Regularly
Use:
- Mild cleaning solutions
- Soft cleaning tools
Avoid harsh chemicals that may damage surfaces.
Prevent Water Problems
For wet areas:
- Keep surfaces dry when possible
- Check for leakage issues
Choosing a Tile Installation Contractor in Singapore
Selecting the right contractor is important.
Experience
Look for installers experienced with:
- Different tile materials
- Residential projects
- Renovation works
Quality Workmanship
A good installer should demonstrate:
- Proper alignment
- Clean finishing
- Attention to detail
Transparent Quotation
A detailed quotation should include:
- Installation scope
- Labour charges
- Preparation work
- Additional services
Good Communication
A reliable contractor should explain:
- Installation steps
- Expected timeline
- Maintenance advice
Conclusion
Tile installation is a key part of creating a durable and attractive home. While choosing the right tile design is important, proper preparation and professional workmanship determine the final quality.
A successful tile installation Singapore project requires careful planning, accurate measurements, correct materials, and experienced installers.
By understanding the installation process and common problems, homeowners can make better renovation decisions and enjoy beautiful, long-lasting tile surfaces for years to come.